
Creating a mouth sponge on a stick is a practical project often needed in caregiving situations, such as for individuals with medical conditions, the elderly, or children requiring assistance with oral hygiene. This tool is frequently utilized in medical environments, yet it can be made at home with ease and at a low cost. Below is a step-by-step guide to making a DIY mouth sponge on a stick, along with tips for safety, maintenance, and customization.

Why Make a Mouth Sponge on a Stick?
A DIY mouth sponge on a stick offers several advantages:
1. Cost-Effective: It’s much cheaper than purchasing commercial oral care tools.
2. Customizable: You can choose materials suitable for the specific needs of the user.
3. Accessible: Perfect for home caregivers or situations where store-bought tools are unavailable.
Materials You’ll Need
Prior to commencing, assemble these materials:
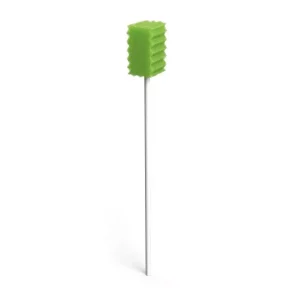
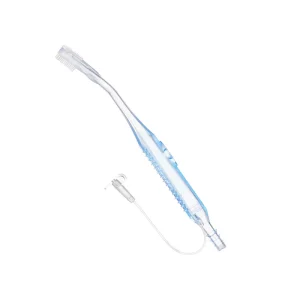
1. Sponge:
- Use a soft, sterile, and non-toxic sponge suitable for oral use.
- Foam or medical-grade sponges are ideal.
2. Stick/Handle:
- A plastic or wooden stick that’s lightweight, smooth, and splinter-free.
Popsicle sticks, craft sticks, or bamboo sticks work well.
3. Adhesive:
- A non-toxic, food-safe glue, such as a medical adhesive or hot glue.
4. Scissors or Utility Knife:
- For cutting and shaping the sponge.
5. Tape (Optional):
- Use medical or masking tape for added security.
6. Sterilizing Solution:
- Alcohol wipes or boiling water for cleaning the materials.
Step-by-Step Guide to Making a Mouth Sponge on a Stick
Step 1: Choose the Right Sponge
The sponge is the most critical part of this DIY project. It must be soft, absorbent, and safe for oral use. Avoid kitchen or scouring sponges, as they may contain harmful chemicals.
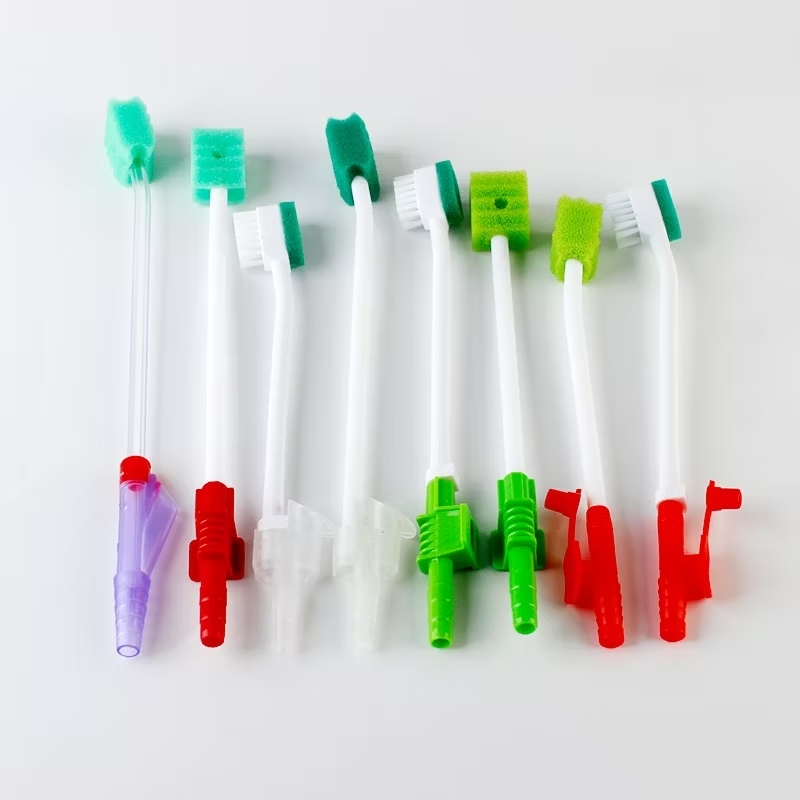
Recommended Types:
- Medical-grade oral care sponges.
- New, unused foam sponges with fine pores.
- Baby sponges or soft makeup sponges (ensure they are non-toxic).
If using a foam sponge, check its label for food or medical safety certifications.
Step 2: Select a Suitable Stick
Select a handle that feels comfortable to grip and is of sufficient length to access all parts of the mouth.
Material Options:
- Popsicle sticks (smooth and disposable).
- Bamboo skewers (cut off sharp edges).
- Plastic sticks or straws (lightweight and reusable).
Ensure the stick is free of splinters, sharp edges, or toxic coatings. If necessary, sand down any rough areas for smoothness.
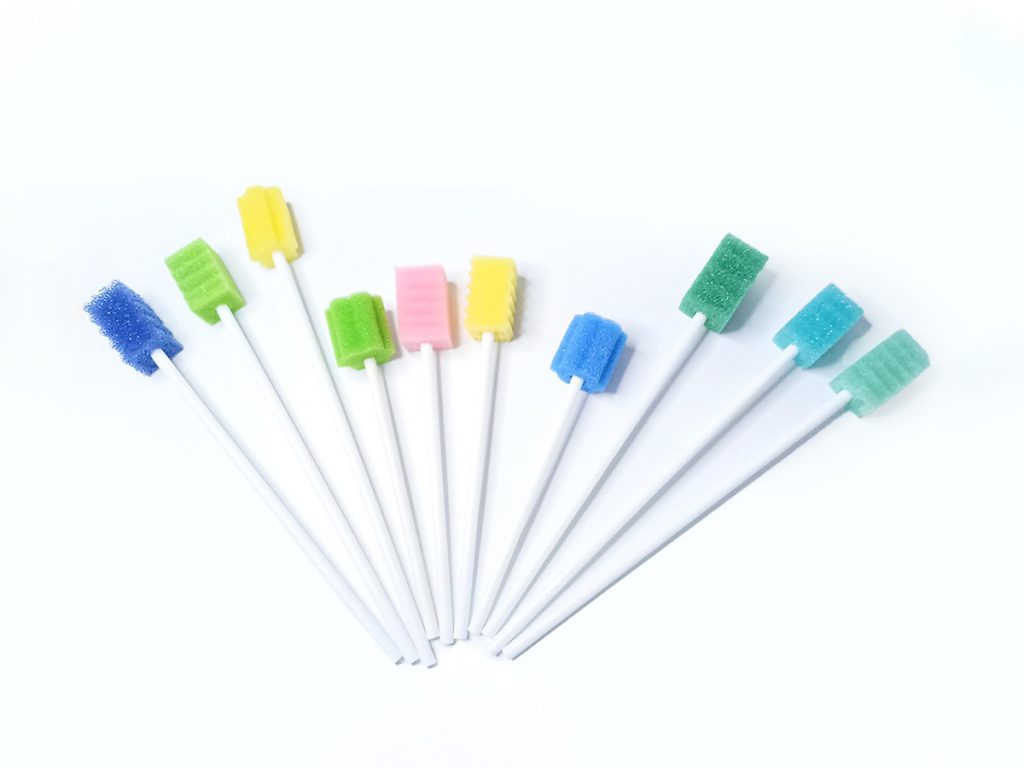
Step 3: Prepare the Sponge
- Trim to Size: Cut the sponge into a small, manageable piece. A 1-inch square or circle works well for most users.
- Shape the Edges: Round the edges of the sponge to prevent irritation inside the mouth.
- Sanitize: Sterilize the sponge by soaking it in a mild disinfectant solution, rinsing thoroughly with clean water, and air-drying completely.
Step 4: Attach the Sponge to the Stick
Method 1: Using Non-Toxic Glue
- Apply Glue: Place a small amount of food-safe adhesive on the end of the stick.
- Press Sponge Firmly: Attach the sponge to the stick and press gently to ensure it adheres securely.
- Allow to Dry: Let the glue dry completely before use. Follow the glue manufacturer’s instructions for drying time.
Method 2: Using Tape
- Wrap Tape Around the Base: Position the sponge on the stick and wrap the medical tape tightly around the connection point.
- Secure Firmly: Ensure the tape covers the entire base of the sponge to prevent it from detaching during use.
Step 5: Add Final Touches
- Test the Strength: Tug gently on the sponge to ensure it is securely attached to the stick.
- Smooth the Edges: Ensure the edges of the sponge and stick are smooth to avoid scratching or irritating the mouth.
- Optional Customization: Add a small loop or string for hanging storage, or mark the handle for easy identification if making multiple sponges.
Step 6: Sterilize the Finished Product
Once assembled, sterilize the entire mouth sponge on a stick to ensure it is safe for use. Use one of the following methods:
- Alcohol Wipes: Wipe down the handle and sponge with a sterile alcohol wipe.
- Boiling Water: Briefly submerge the sponge and stick it in boiling water, ensuring the adhesive and materials can withstand heat.
- UV Sterilizer: If available, place the tool in a UV sterilizer for a thorough cleaning.
Step 7: Use and Maintenance
How to Use
- Moisten the Sponge: Dip the sponge in water or a mild mouthwash solution.
- Gently clean the oral cavity: Utilize the sponge to clean the tongue, gums, and teeth. Avoid scrubbing too hard to prevent irritation.
- Dispose or Reuse:
- If using disposable materials, discard the sponge after each use.
- For reusable sponges, clean and sterilize after every use.
Cleaning Instructions
- Wash right away: After using it, rinse the sponge well with tepid water and gentle detergent.
- Sanitize: Use a disinfectant or boiling water to remove any remaining bacteria.
- Dry Properly: Air-dry in a clean, well-ventilated area.
Applications of a Mouth Sponge on a Stick
This DIY tool has multiple uses in caregiving and personal hygiene:
1. Oral Care for Patients:
- Elderly individuals with limited mobility.
- Bedridden patients require gentle oral hygiene.
2. Children’s Oral Hygiene:
- An alternative to traditional toothbrushes for toddlers.
3. Post-Surgery Care:
- Suitable for individuals recovering from oral or dental surgery.
4. General Hygiene:
- Cleaning dentures or braces.
Safety Precautions
To guarantee the safe use of the tool:
- Utilize Non-Toxic Materials: Confirm that all parts are safe for food and do not contain dangerous substances.
- Check for Sharp Edges: Eliminate any rough spots on the stick or sponge.
- Regular Replacement: Get rid of the sponge right away if it appears worn or contaminated.
- Avoid Sharing: To prevent germ transmission, do not allow multiple users to share the tool.
Customization Ideas
- Color-Coded Handles: Use different colors for specific purposes or users.
- Adjustable Lengths: Create tools with varying stick lengths for different needs.
- Scented Sponges: Infuse the sponge with a mild, safe scent for a more pleasant experience.
Benefits of a DIY Mouth Sponge on a Stick
- Affordable: Costs a fraction of store-bought tools.
- Eco-Friendly: Allows for reusable materials, reducing waste.
- Tailored Design: Customize the size, shape, and length to fit individual needs.
- Convenience: Easy to make with common household materials.
Troubleshooting Common Issues
- Sponge Detaches Easily: Reinforce with additional adhesive or tape.
- Stick Splinters: Sand the stick thoroughly or use a plastic alternative.
- Sponge Too Hard: Choose a softer material designed for oral use.
Conclusion
Making a DIY mouth sponge on a stick is a simple and practical solution for a variety of oral care needs. By carefully selecting safe materials and following the step-by-step guide above, you can create an effective and customizable tool at a low cost. Whether for caregiving, personal hygiene, or medical recovery, this project empowers you to meet specific needs with ease and confidence. Give making your own a try today, and take pleasure in the advantages of this adaptable and budget-friendly tool!